Postal details Rest API Design Document
Create a REST API which will accept customer id ID as query parameter. Use the customer ID to fetch pin from crm_customers table and use pin received to get postal address details from India Post using Rest API. Transform the response in the desired format to generate final response
Postal details Rest API
Description:
It is an API which is used to get customer data from DB and use that data to get postal details from India Post API. We have the crm_customers table and it has following no of columns in remote DB as shown below Customer’s table column name
| Fields | Data Types |
|---|---|
| Id | Integer |
| first_name | varchar |
| last_name | varchar |
| address | varchar |
| pin | Integer |
| varchar | |
| login | varchar |
| identifier | varchar |
Login to Quick Integration Platform
Click here to login https://designer.quickintegrate.io/login
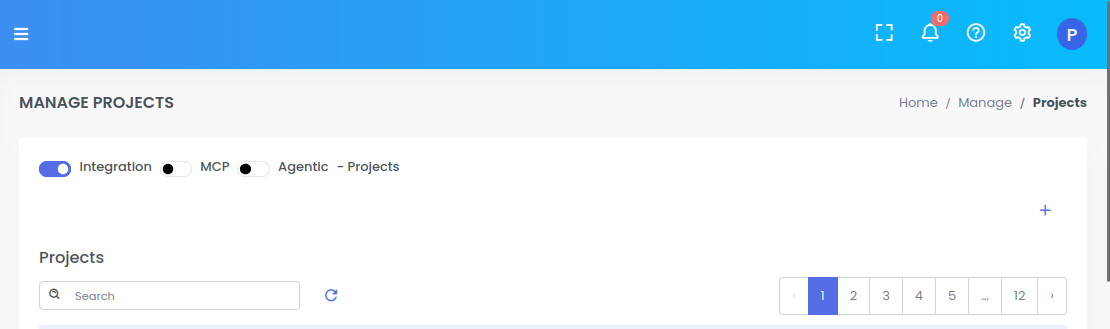
Create new project
From the left panel Click on Manage Option >> Projects

On the right click on + sign to create the new project
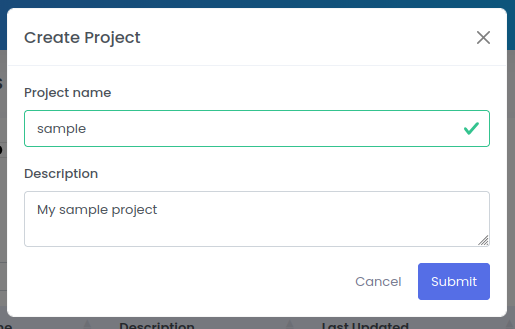
Type the Project name and Description and click submit button to create the new project.
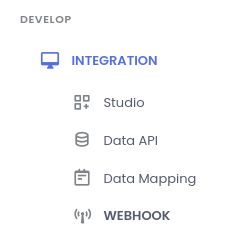
Go to Integration studio to create service
From the left panel select INTEGRATION >> Studio
Add new service
Select the newly created project from the dropdown
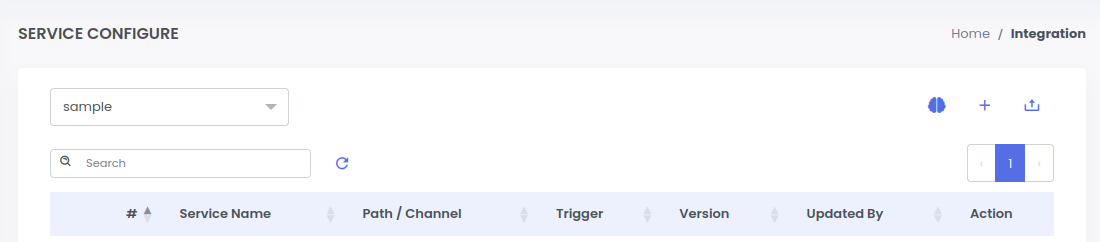
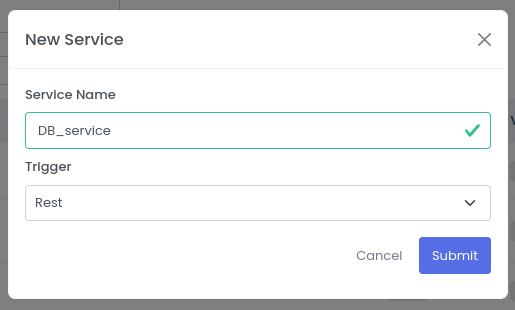
Click on + sign to create a new service. Fill the Service Name and select the REST as Trigger and click Submit button
After the service is created, a canvas will show up to build the quickintegrate flow
Configure connection properties
Configure connection properties for DB and REST call before adding the steps for the API
a. Click on 3rd icon to open connection properties page
b. Select JDBC datasource type from the dropdown
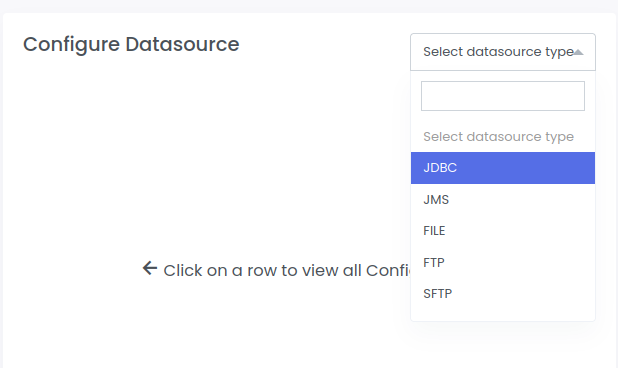
c. Configure the database datasource as below and click on Submit button
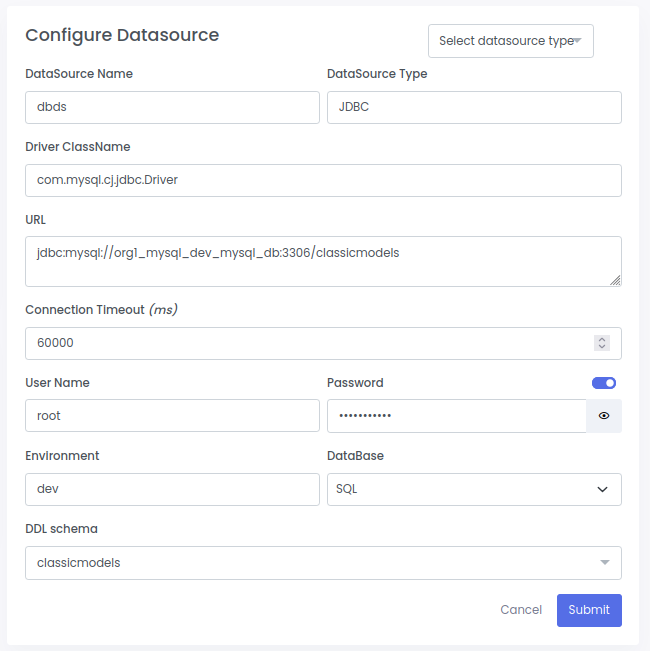
Check Model Design to add database schema
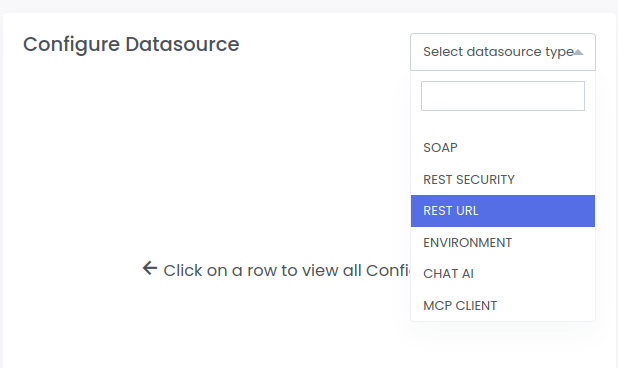
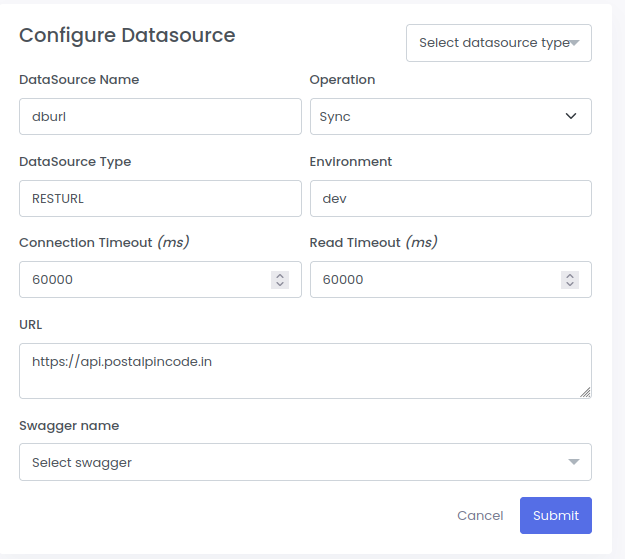
d. Select REST URL datasource type from the dropdown
e. Configure the rest datasource as below and click on Submit button
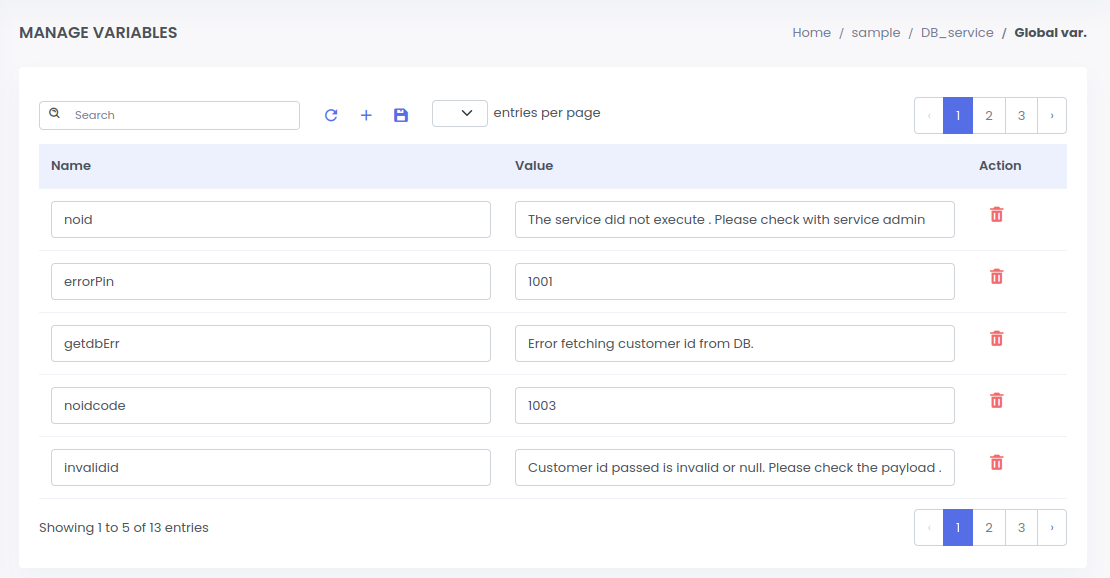
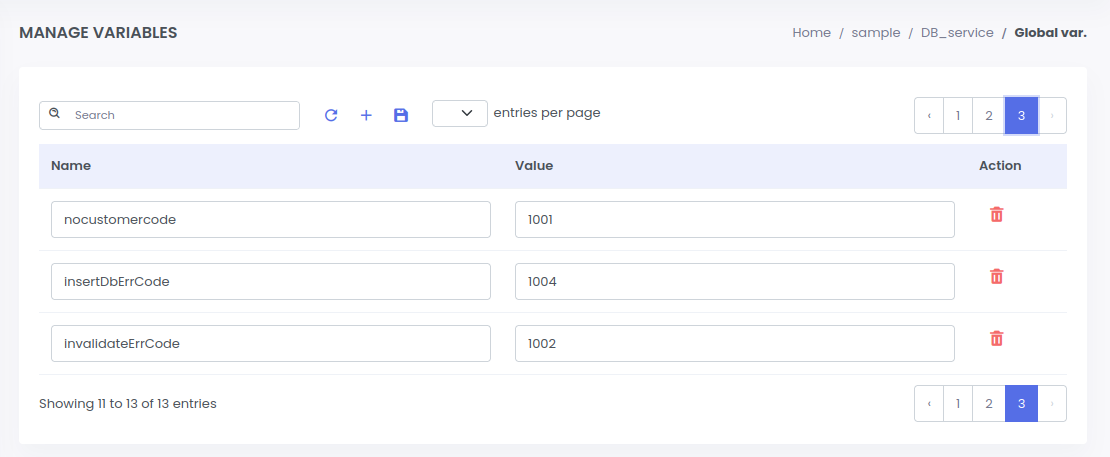
Define Global variables
Define Global variables to be used in the service:
a. Click on 4th icon to open global variable page

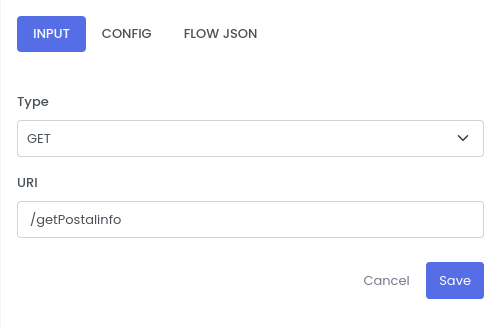
Configure REST trigger
Right click on REST Trigger to Configure as given below.
| Fields | Description | Examples |
|---|---|---|
| type | Methods can be GET, POST, PUT, PATCH and DELETE | GET |
| uri | URI to trigger the API service | /getPostalinfo |
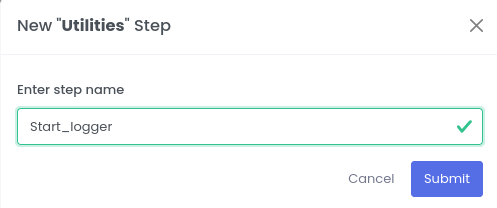
Configure start logger
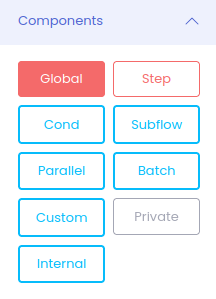
Select the Transformers from the left components panel
Drag and drop the Utilities transformer to the canvas using left click to add start logger for your service.
Enter the Step name and click submit
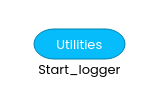
Right click on Utilities transformer and configure as given below.
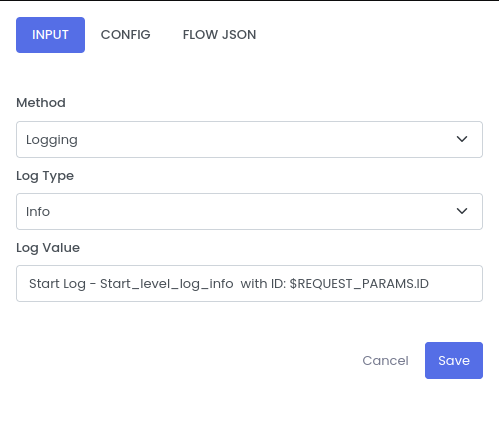
Methods:
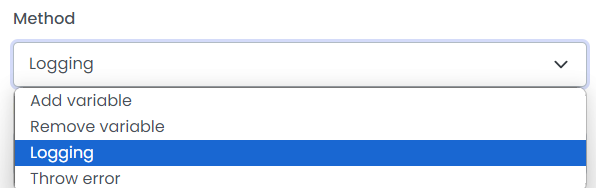
Log type:
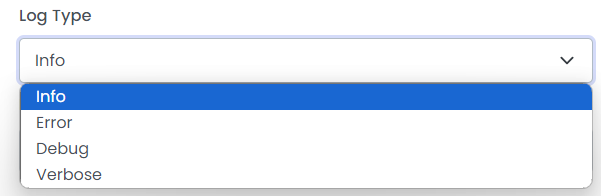
Log Value:
Start Log - Start_level_log_info with ID: $REQUEST_PARAMS.ID
Configure URL validator
Select the Transformers from the left components panel
Drag and drop URL transformer to the canvas using left click to validate the URL.
Enter the Step name and click submit


Right click on URL transformer and configure as given below.

Configure database step
Select the Connectors from the left components panel
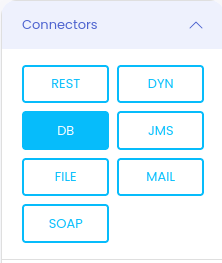
Drag and drop DB Connector to the canvas using left click to make Database call in the service.
Enter the Step name and click submit
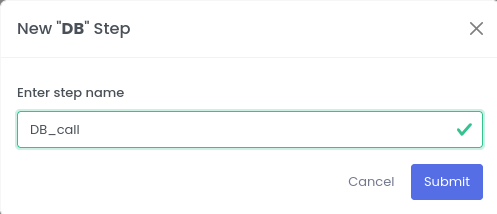
Right click on DB Connector and configure as given below.
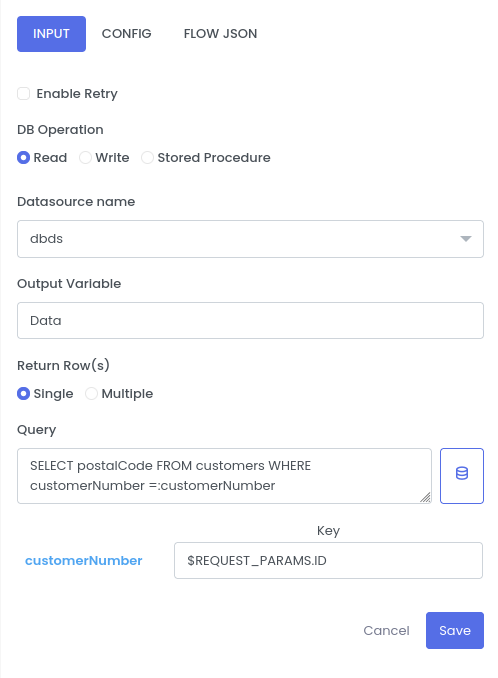
| Fields | Description | Example |
|---|---|---|
| DB Operation | Read/Write | Read |
| Datasource Name | Datasource Name which is configured in connections properties | dbds |
| Return Row(s) | Single, Multiple | Single |
| Output Variable | This field is the variable name for which the output of the following step is store in the pipeline | Data |
| Query | This is the Database commands | SELECT pin FROM crm_customers WHERE id=:id |
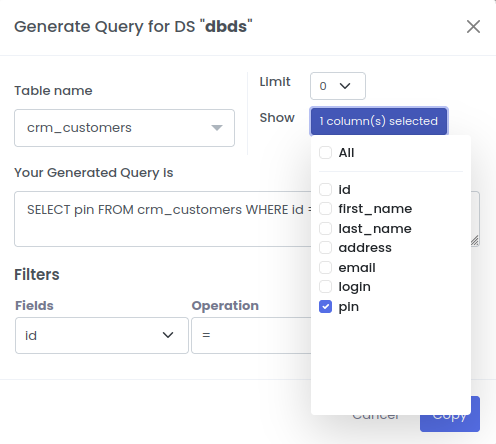
Let see how to write the query using quickintegration with few clicks
We can select tables from the dropdown list present in our database.
we can limit the number of records to be retrieved.
Filters help to add the condition for every field selected with operaions to compare like NULL, NOT NULL, =, !=, etc
Your Query will be generated!.
- Select the Table Name, Fields and operation from the dropdown list
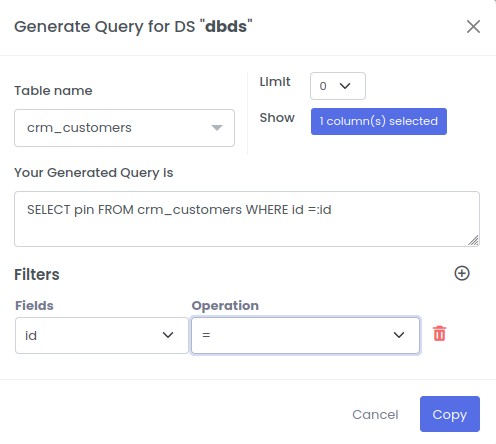
- Select the coloumn names
| Fields | Description | Example |
|---|---|---|
| Table Name | Data Base Table Name | crm_customers |
| Your Generated Query is | Data Base Query | SELECT pin FROM crm_customers WHERE id:id |
| Filters(Fields) | Perticular field where DB will Operate | id |
| Filters(Operation) | Operations like NULL, NOT NULL, =, !=, etc | = |
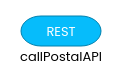
Configure Postal API step
Select the Connectors from the left components panel
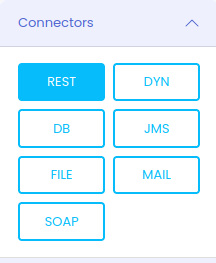
Drag REST connector to make India Post REST API call to get postal details based on PIN code.
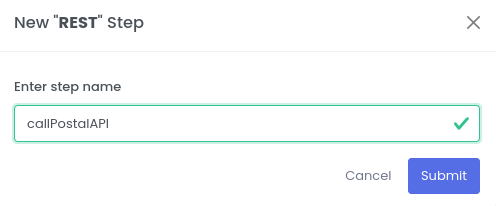
Right click on REST connector and configure as given below.
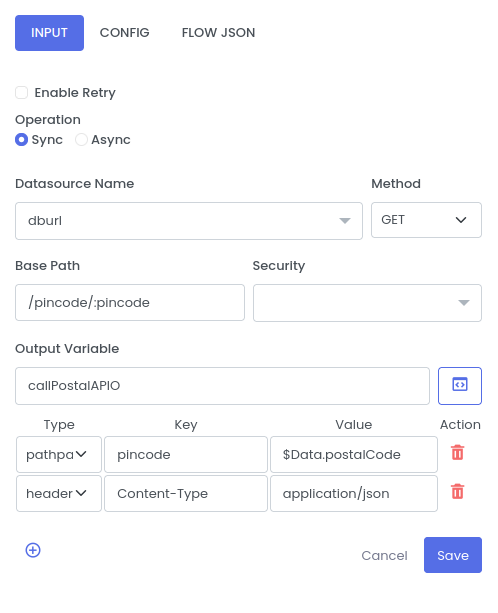
| Fields | Description | Example |
|---|---|---|
| Datasource Name | Rest datasource configured in connection properties | dburl |
| Method | Http method like GET, POST, DELETE, etc | GET |
| Base Path | Resource Path | /pincode/:pincode |
| Security | To be Defined in the propertioes like Basic Authentication, OAuth token, Authorization Code, etc | |
| Output Variable | Stores output of connections operations | callPostalAPIO |
| Type | Description | Key | Value |
|---|---|---|---|
| pathparams | Path parmeter for REST call | pincode | $Data.postalCode |
| header | Header for REST call | Content-Type | application/json |
Configure Response step
Select the Transformer from the left components panel
Drag APIRes transformer to return the response back to the client

Right click on APIRes transformer to configure
Click on the Drop down and select Content Type application json
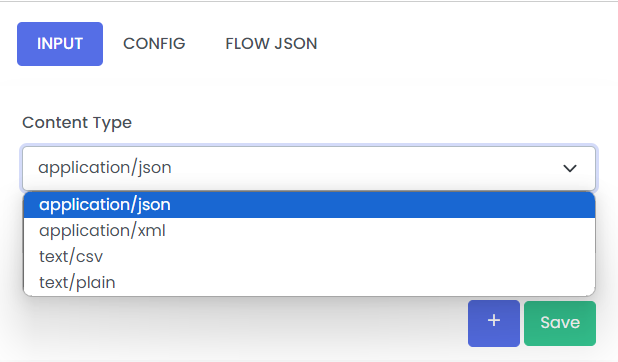
Click on + button to add more mappings.
Create the response object as shown below
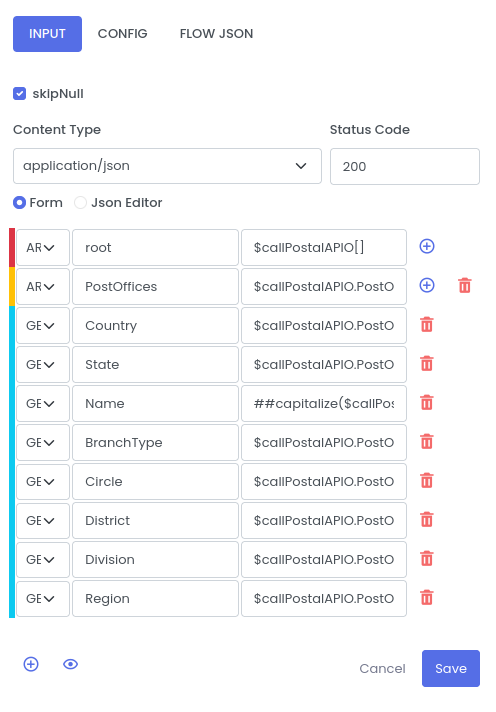
When we want to get a variable from the pipeline, we use $ sign as prefix followed by Variable name from in the pipeline. There can be nested values which can be accessed by dot operator '.' for example $Payload.key.
Note:- The variable name should be present in the pipeline before the calling
| Fields | Description |
|---|---|
| GEN | Map a single key to a value |
| TRANS | Transforms the Input value with the help of inline functions |
| CN | Map the Input variable directly to output |
| OBJ | Mapped the Inputs to Object |
| AR | Mapped the Inputs to Array |
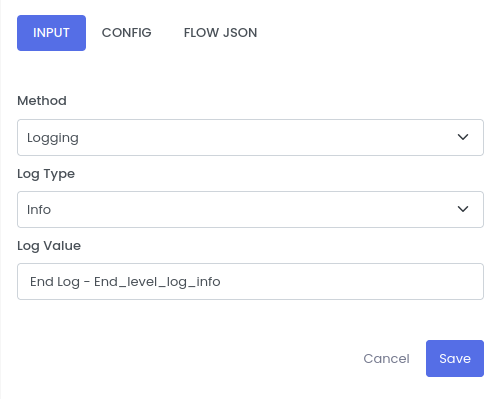
Configure end logger
Select the Transformers from the left components panel
Drag and drop the Utilities transformer to the canvas using left click to add End logger for your service.

Right click on the End logger utilities transformer and configure it as shown below
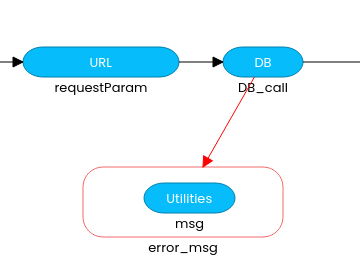
DB Step Exception handling
Any exceptions or error occured on DB step will be handled by the Step component
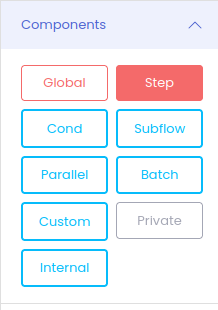
Select the Step exception handler from the palate, drag it to the canvas
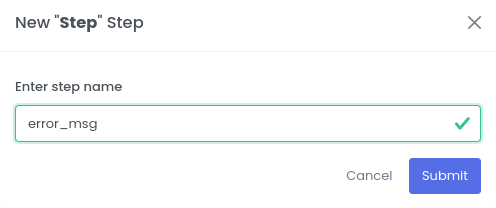
Drag Utilities transformer and drop inside the error_msg step handler and name it msg
Right click on the msg Utilities to configure as shown below
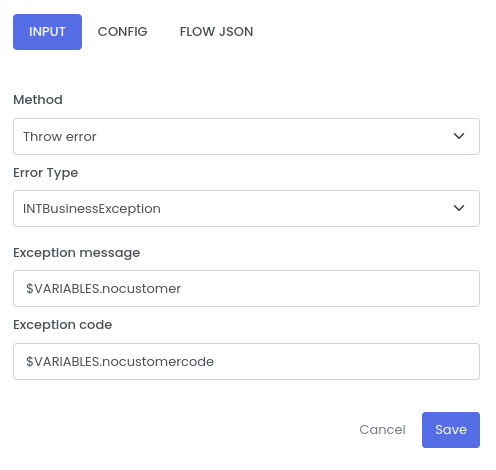
| Fields | Description | Example |
|---|---|---|
| Method | This is the utility function to throw the error in the flow | throw error |
| Error Type | Type of Exception thrown in the flow such as INTBuinessException and INTRetryException | INTBuinessException |
| Exception message | The custom message while throwing the custom Exception | $VARIABLES.nocustomer |
| Exception code | The code while throwing the Execption | $VARIABLES.nocustomercode |
After adding the DB step exception handler, the configuration should look like below
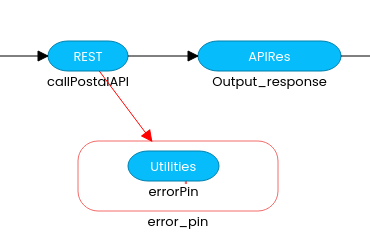
REST Step Exception handling
Any exceptions or error occured on REST step will be handled by the Step component
Select the Step exception handler from the palate, drag it to the canvas
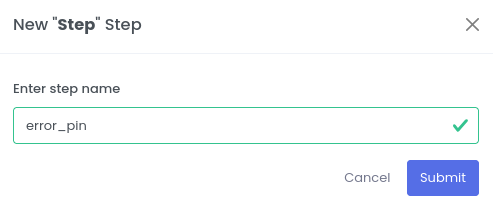
Drag Utilities transformer and drop inside the error_pin step handler and name it errorPin
Right click on the errorPin Utilities to configure as shown below
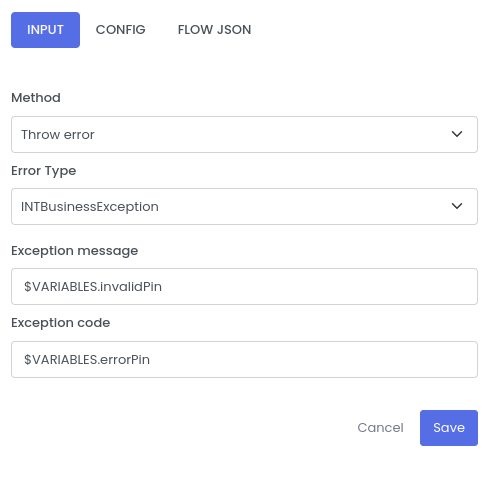
| Fields | Description | Example |
|---|---|---|
| Method | This is the utility function to throw the error in the flow | Throw error |
| Error Type | Type of Exception | INTBuinessException |
| Exception message | The custom message while throwing the custom Exception | $VARIABLES.invalidPin |
| Exception code | The code while throwing the Execption | $VARIABLES.errorPin |
After adding the REST step exception handler, the configuration should look like below
Setup Global Exception handler
Global Exception handler handles any exception or error thorwn by any node in the API service.
It is similar to step exception handler but for all nodes.
Select the Global Error from the palate, Drag it to the canvas and configure it as shown below
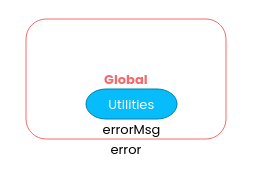
Right click on the errorMsg Utilities to configure as below
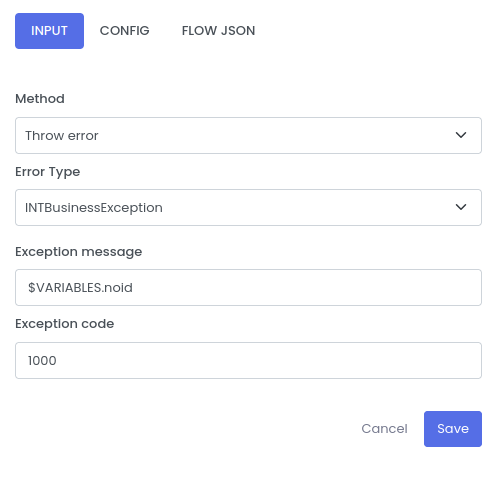
| Fields | Description | Example |
|---|---|---|
| Method | This is the utility function to throw the error in the flow | Throw error |
| Error Type | Type of Exception | INTBuinessException |
| Exception message | The custom message while throwing the custom Exception | $VARIABLES.noid |
| Exception code | The code while throwing the Execption | 1000 |
If any error occurs in the service during processing. It is handled in the global Exception handler.
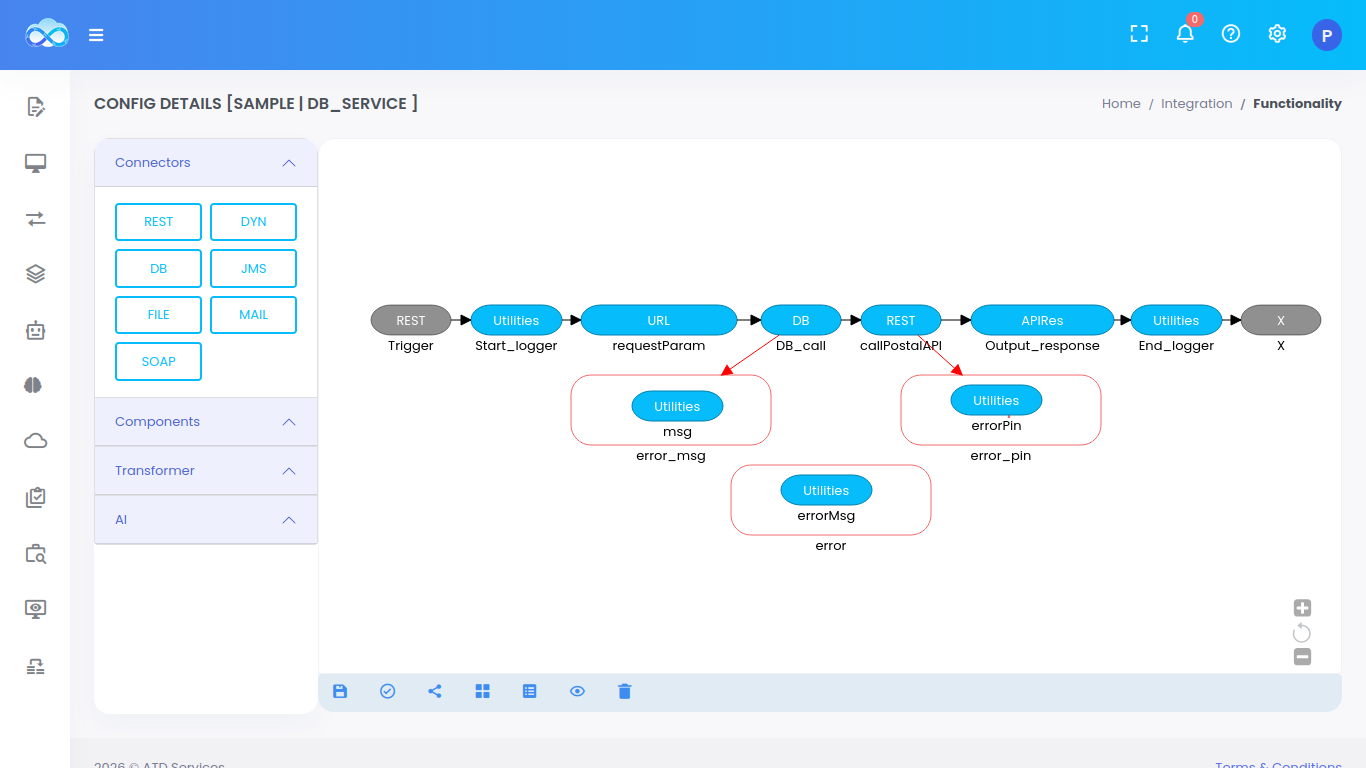
Final quickintegrate flow:
At the end the final canvas should look like this
Steps to build and deploy the API service
Step to Test the API Deployed on QuickIntegration.
Check how to build and deploy the above service- Save the application.
- Go to EXECUTE >> BUILD to Build the application.
- Deploy the application after build. Select the Application Name From Drop down, and pass the security key in Properties. Click on deploy application.
- Go to application and Bring UP the application by clicking on project.
- Provide the security key and start the API.
- Once you Successfully started your API, you will find Development URL in Details column
- Using the QuickIntegrate deployed URL You can Test your API using Postman Collection